Compression sleeves are the most bought and most returned knee product on the internet, and the two facts share one cause: sizing. A sleeve that fits correctly feels like a reassuring, warm handshake around the joint. The same sleeve one size too small feels like a tourniquet, and one size too large is a sock that slides to your calf by the end of the driveway. People try one badly sized sleeve, conclude "sleeves do not work," and miss out on a genuinely useful, inexpensive tool.
This guide fixes the sizing problem completely: where exactly to measure, how to read any brand's chart, what to do when you land between sizes, a four-point fit check for the first wear, and, because expectations matter as much as measurements, an honest section on what compression sleeves do and do not do for your knees.
What a Compression Sleeve Actually Does
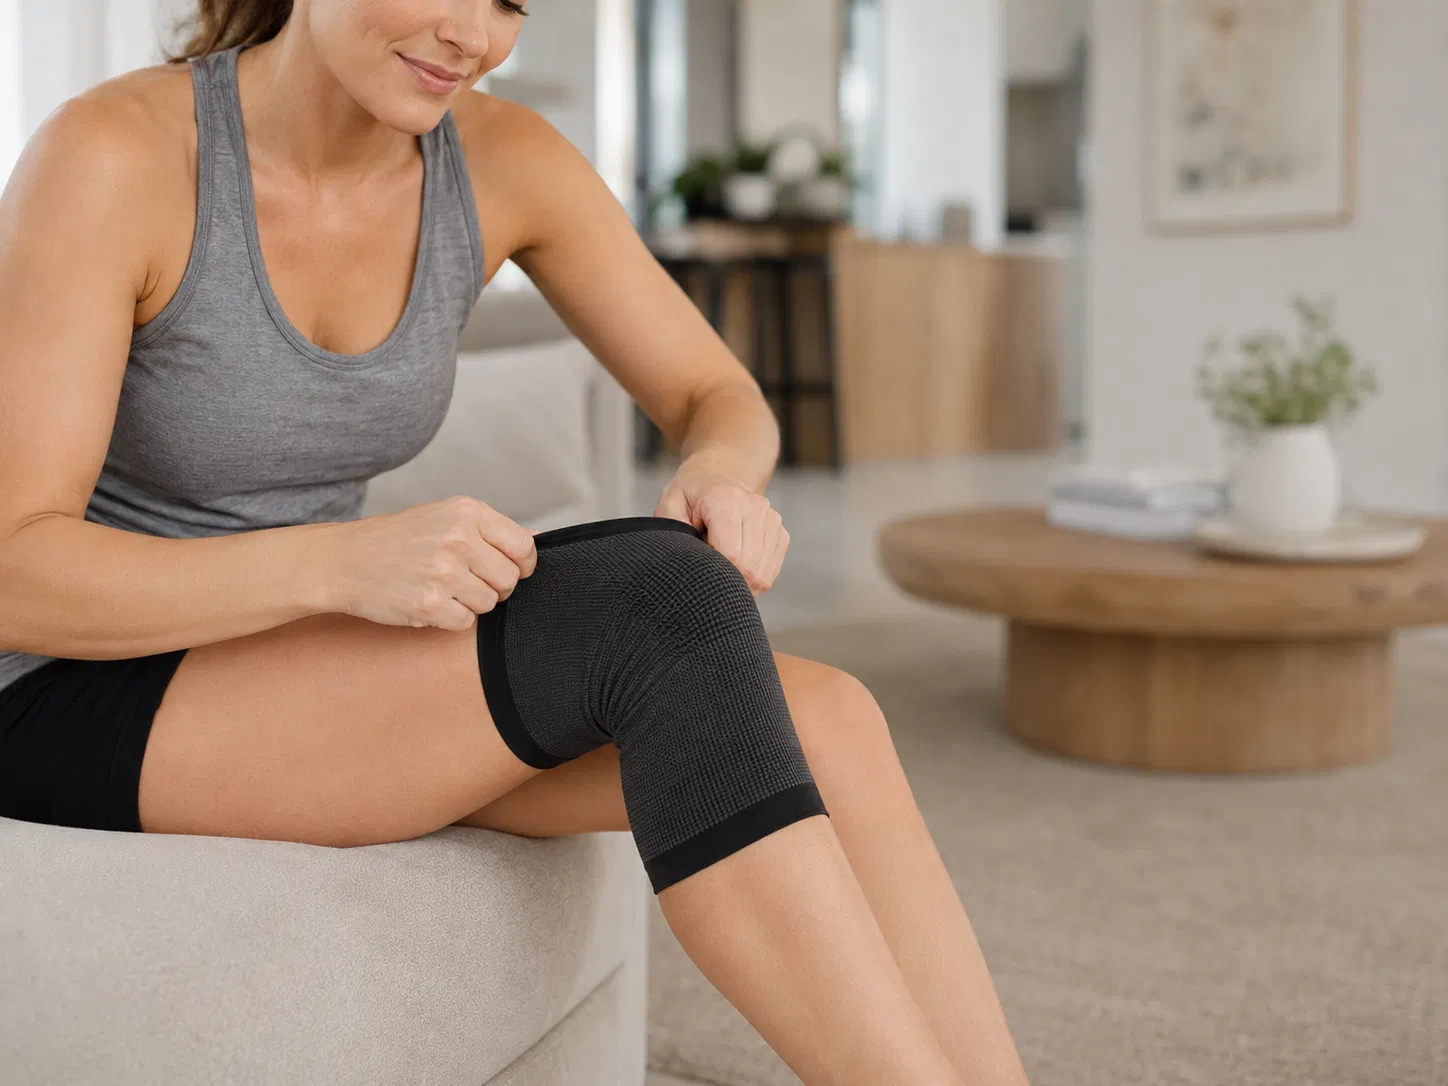
A knee compression sleeve is a tube of elastic knit fabric that applies gentle, even pressure around the joint. That simple pressure produces four real effects. First, proprioception: the constant light contact feeds your nervous system a continuous stream of information about where your knee is and how it is moving. Joints with better position-sense are controlled more precisely by the muscles around them, which is a big part of why a sleeved knee simply feels more trustworthy on stairs and uneven ground. Second, warmth: the fabric layer keeps the joint warmer, and warm tissue moves more comfortably than cold tissue, especially for knees that stiffen with rest. Third, mild circulation support: gentle compression assists fluid movement in the tissues around the knee, which helps with the puffy, tired feeling after long days. Fourth, the psychological but very real confidence effect: a supported-feeling knee changes how willingly you move, and moving willingly is itself therapeutic.
Just as important is what a sleeve does not do. It does not hold your kneecap in a different track, correct leg alignment, stabilize a torn ligament, or fix the underlying reason your knee complains. A sleeve is support for comfort and confidence during movement. The lasting fixes still come from strength work like the routines in our knee strengthening guide, sensible activity progression, and habits. If a knee feels unstable or gives way, that is assessment territory, not sleeve territory. And if your main sensation is stiffness rather than pain, our guide on knee tightness without pain maps that pattern separately.
Step 1: Measure in the Right Places
Grab a flexible measuring tape (a string plus a ruler works in a pinch) and stand with your weight even and the leg you are measuring straight and relaxed. Muscles change shape dramatically when flexed or bent, so a bent-knee or tensed-thigh measurement will lie to you by a full size or more.

Take two measurements. Thigh circumference: find the center of your kneecap, measure 15 cm (6 inches) straight up the thigh, and wrap the tape around at that height, snug against the skin without denting it. Calf circumference: same idea, 15 cm below kneecap center. Write both numbers down in centimeters and inches, since charts vary. Two pro details: measure in the afternoon or evening, because legs are slightly larger later in the day and a sleeve sized to your morning leg can pinch by dinner; and measure both legs if you plan to wear sleeves on both, because a size difference between legs is common and each knee deserves its own size.
Step 2: Read the Size Chart Correctly
Every brand publishes its own chart, and they do not agree with each other, which is why "I wear medium" is meaningless across brands. Always match your fresh measurements to the specific chart of the sleeve you are buying. A typical chart looks like this:
| Size | Thigh (15 cm above kneecap) | Calf (15 cm below kneecap) |
|---|---|---|
| S | 39-44 cm / 15.5-17.5 in | 30-34 cm / 12-13.5 in |
| M | 44-49 cm / 17.5-19.5 in | 34-38 cm / 13.5-15 in |
| L | 49-54 cm / 19.5-21.5 in | 38-42 cm / 15-16.5 in |
| XL | 54-60 cm / 21.5-23.5 in | 42-47 cm / 16.5-18.5 in |
(Example values for illustration; always use the chart of the exact product you buy.) Three chart-reading rules cover nearly every situation. Rule one: if your thigh and calf land in different rows, follow the thigh, because the upper band determines whether the sleeve stays up, and a top that fits will tolerate a slightly loose calf far better than the reverse. Rule two, the between-sizes decision: size up for long comfortable daily wear or if pressure tends to aggravate your knee; stay with the smaller size for sport and activity, where fabric warms and relaxes slightly and you want the support to survive movement. Rule three: if the brand's chart measures directly at the kneecap instead, follow their instructions exactly, since mixing measurement systems is the fastest route to the wrong size.
Step 3: The Four-Point Fit Check
The chart gets you to the right size on paper. The first wear confirms it on your actual leg. Pull the sleeve on so its center opening or center pad sits directly over your kneecap, with the fabric smooth and even above and below, then run this quick check.

Center check: the sleeve sits symmetrically with the kneecap in the middle. Bend check: do one slow squat or a full sit-down-stand-up; the sleeve should move with you, without pinching in the crease behind the knee and without sliding down. Color and sensation check: after ten minutes of wear, the skin below the sleeve looks its normal color and nothing tingles or feels numb. Walk check: two minutes of normal walking without the sleeve migrating or needing adjustment. Pass all four and your size is right. Fail the bend or walk check with sliding and bunching, and you are a size too large. Fail the color check or feel pinching, and you are a size too small, no matter what the chart said.

Before settling on a size, it is worth confirming that a sleeve is the right category at all. Straps, wraparounds and hinged braces each solve a different problem, and our comparison of knee braces versus compression sleeves shows which one matches your symptoms.
Compression Levels: Light, Medium, and Firm Explained
Size determines whether the sleeve fits; the knit's compression level determines how strong the squeeze is at that size, and the two are frequently confused. Light compression, in sock terms roughly the 15 to 20 mmHg neighborhood, feels like attentive fabric: barely-there pressure suited to all-day comfort wear, mild achiness, and knees that dislike being squeezed. Medium compression, around 20 to 25, is the sweet spot for most activity use: enough pressure for a clear supported feeling and warmth, still comfortable across a long walk or a work shift. Firm compression suits high-demand sport and post-activity recovery windows, but it punishes sizing errors and long wear times, and it is not the beginner's choice. Most quality knee sleeves sit in the light-to-medium band by design, because that is the range people actually keep wearing. If a sleeve does not state its level at all, judge it by the four-point fit check and how your leg feels after an hour; your skin gives more honest readings than a spec sheet.
One practical rule ties size and level together: never compensate for the wrong compression level with the wrong size. Sizing down to make a light sleeve feel firmer produces pinch points behind the knee rather than useful pressure, and sizing up to soften a firm sleeve produces a loose top band that slides. Choose the level you want, then buy your true measured size in it.
Putting It On Correctly (Yes, There Is a Technique)
A surprising share of "wrong size" complaints are actually wrong donning. The reliable method: sit down, fold the top third of the sleeve outward and down over itself, slide your foot through and pull the folded sleeve up over the calf until the opening or center pad reaches the kneecap, then unfold the top band up onto the thigh and smooth every wrinkle upward and downward from the knee. Wrinkles are not cosmetic; each fold is a pressure ridge that will announce itself an hour into wear, most often in the sensitive crease behind the knee. Two more habits worth building: put the sleeve on before the activity rather than after discomfort starts, since it works better as preparation than rescue, and pull from the fabric's body rather than the top edge, because repeatedly stretching the top band is what kills its grip over months.
Sizing Mistakes We See Constantly
Measuring over jeans or leggings, which silently adds one to three centimeters and one full size. Measuring the knee at its widest point when the chart asks for thigh and calf, or the reverse. Trusting last year's measurement after a training block, a weight change, or a swelling-prone season, when legs genuinely change size. Buying one size for both legs without measuring both, then blaming the sleeve when it fits one knee and strangles the other. Choosing size by clothing logic, as in "I wear medium shirts," which has no relationship to leg circumference. Ordering between sizes downward for daily wear because tighter feels like it must be doing more, then abandoning the sleeve within a week because it is unwearable past lunchtime. Every one of these is avoidable with the two measurements from this guide and thirty honest seconds with the chart.
Wearing It Well: When, How Long, and Care
The intended pattern is activity-based wear: put the sleeve on for walks, workouts, stairs-heavy days, long shifts on your feet, hikes, and sports, and take it off during long sedentary stretches and always at night, so circulation runs completely unrestricted while you sleep. A few hours to most of an active day is fine; around-the-clock dependence is not the goal. In fact, treating the sleeve as permanent scaffolding can work against you, because the muscles that stabilize your knee still need to do their job. Sleeve plus strength work is the winning combination; sleeve instead of strength work is a slow decline. Pair your sleeve days with the progression in our guide to knee pain going down stairs if descending is your hard moment, since that is exactly where the added joint-awareness helps most.
Care determines lifespan. Hand wash in cool water with mild soap, squeeze without wringing, and air dry away from direct heat; machine heat is what kills elastic fibers. Rotate two sleeves if you wear one daily. And replace a sleeve when it no longer passes the walk check even in the right size, typically after 6 to 12 months of regular use, because stretched-out compression is decorative rather than functional.
Fit Questions Real Legs Ask
Standard charts assume standard proportions, and legs decline to cooperate. The most common real-world cases: athletic calves with slimmer thighs, where the calf measurement lands a size above the thigh; here, follow the calf if the sleeve is a long style that grips mostly below the knee, but for standard sleeves follow the thigh and accept a firmer calf feel, or look for brands offering athletic cuts. The reverse pattern, fuller thighs with slimmer calves, is even more common and is exactly why the follow-the-thigh rule exists, because a top band that cannot settle comfortably will either roll down into a garrote or refuse to stay up at all; if your thigh lands beyond the chart, choose a sleeve line that publishes extended sizes rather than forcing the largest standard one. Knees that change size through the day, familiar to anyone with arthritis or swelling-prone legs, should be measured at their typical afternoon size, and if you fluctuate a full size between morning and evening, light compression in the larger size is the livable choice. And if you wear the sleeve over a bandage or patch, measure with it on.
One Sleeve or Two? And When to Re-Measure
If both knees grumble, resist the instinct to buy a matched pair in one size without measuring both legs; a one-size difference between legs is common enough that many of our sizing questions come from exactly this scenario. Buy each knee its own size and mark the sleeves discreetly, because they will look identical in the laundry. Re-measure, rather than reordering on autopilot, after any weight change beyond a few kilograms, after a training block that visibly changed your legs, after pregnancy, and at minimum once a year, since replacing a sleeve in last year's size defeats the purpose of replacing it at all. Finally, keep the receipt logic in mind when buying: a sleeve is a fit product, and any seller confident in their sizing will accept a return on a sleeve that fails the four-point check. That return window is also your safety net for the honest reality that no chart survives contact with every leg; measure carefully, choose sensibly, and let the fit check make the final call.
Sleeve, Brace, or Something Else?
A quick decision map, because the categories get mixed up constantly. Choose a compression sleeve for general support, warmth, mild swelling, confidence during activity, and knees that feel tired or achy with use. Choose a hinged or strapped brace, ideally with professional guidance, when a specific structural problem has been diagnosed and a clinician recommends mechanical support. Choose an active recovery device, like heat, massage, or air compression sessions, when your goal is helping the knee and leg recover after activity rather than supporting it during activity; our air compression guide covers that category in depth. And remember the foundation underneath all of it: footwear and load. If your knees complain mainly during walking and running, the ground-up factors in our insoles guide may matter as much as anything you wrap around the joint.
When a Sleeve Is Not the Answer
See a professional first, rather than sizing a sleeve, if your knee locks or gives way, if there is significant swelling that appeared quickly, if pain followed a specific injury with a pop or twist, if the joint is warm and red, or if pain is severe enough to change how you walk. Compression is comfort-level support for stable, grumpy knees; it is not a treatment for structural or inflammatory problems, and wearing one over an undiagnosed injury mostly delays the diagnosis.
For everyone else: two tape measurements, one honest look at the chart, a four-point check on first wear. Five minutes of care, and the most affordable tool in knee comfort finally gets to do its actual job.
Basketball adds repeated bending, lateral movement and possible floor contact. The basketball sleeve comparison separates plain compression from padded knee protection and explains an on-court fit check.
Frequently Asked Questions
How do I measure my knee for a compression sleeve?
Stand with your leg straight and relaxed. Measure the circumference of your thigh about 15 cm (6 inches) above the center of your kneecap, and your calf about 15 cm below it, using a flexible tape held snug but not compressing the skin. Most size charts use one or both of these numbers. Measure both legs if you are buying for both; legs are often slightly different sizes.
Should a knee compression sleeve be tight?
Snug, not tight. Correct fit feels like firm, even contact you notice for the first few minutes and then mostly forget. Warning signs of too tight: tingling, numbness, skin color changes below the sleeve, or deep grooves in the skin after removal. Signs of too loose: sliding down during walking or bunching behind the knee when you bend.
What if I am between sizes on the chart?
For all-day comfort wear and if your discomfort increases with pressure, size up. For activity and sport where you want maximum support and the sleeve will warm and loosen slightly as you move, most people prefer the smaller of the two sizes. If your thigh and calf fall in different size rows, prioritize the thigh measurement, since the top of the sleeve does most of the staying-up work.
Do knee compression sleeves actually work?
For what they are designed to do, yes: they improve joint awareness (proprioception), provide gentle warmth, support mild circulation, and give a stable, supported feeling that makes many activities more comfortable. They do not correct alignment, fix structural injuries, or replace strengthening. Think of a sleeve as support for the work, not a substitute for it.
How long can I wear a knee sleeve each day?
Wearing a sleeve during activity and for a few hours of demanding daily use is the intended pattern. Take it off during long rest periods and always at night, so circulation runs unrestricted. If you feel you need it every waking hour just to function, that is a signal to get the knee assessed rather than to buy a second sleeve.